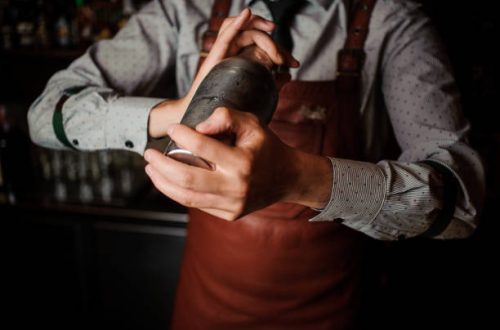
For many coffee enthusiasts, the quest for the perfect iced coffee often ends in disappointment—watery textures, uneven temperatures, and a lack of that signature “froth” found in high-end cafes. However, the solution doesn’t lie in more expensive beans or complex brewing machines, but rather in a tool traditionally reserved for the late-night bar scene: the cocktail shaker. By applying the principles of mixology to your morning brew, you can transform a standard cup of coffee into a luxurious, aerated, and perfectly chilled beverage.
The Science of Shaking: Why Your Iced Coffee Needs a Cocktail Shaker
The primary benefit of using a cocktail shaker for iced coffee is the rapid thermal exchange. When you pour hot or room-temperature coffee over ice and shake it vigorously, the surface area of the liquid contacting the ice increases exponentially compared to simple stirring. This results in a drink that reaches its lowest possible temperature in under twenty seconds, minimizing the time the ice has to melt and dilute the flavor profile.
Aeration and Mouthfeel
Beyond cooling, shaking introduces air into the liquid. This process, known as aeration, breaks down the surface tension of the coffee and creates tiny micro-bubbles. For coffee, which contains natural oils and proteins, this results in a thick, velvety foam on top, similar to the “crema” found on a well-pulled espresso. This textural change alters the way the coffee hits your palate, often making it taste smoother and less acidic without the need for additional dairy or sweeteners.
- Kinetic Chilling: Shaking forces the liquid to move rapidly across the ice, cooling it faster than any other method.
- Texture Enhancement: The mechanical action emulsifies the coffee’s natural oils, creating a creamy mouthfeel.
- Flavor Integration: If adding syrups or milk, shaking ensures a perfectly homogenous mixture that won’t separate over time.

Essential Equipment: Choosing the Right Shaker for Your Morning Brew
While any sealed container could technically work, the type of shaker you choose will impact your experience and the final quality of the drink. Different shakers offer varying levels of thermal insulation and ease of use, which are critical when handling cold liquids in a warm kitchen environment.
Comparing Shaker Types
The most common shakers found in home kitchens are the Cobbler and the Boston shaker. Each has distinct advantages for the home barista. The Cobbler shaker is often preferred by beginners because it includes a built-in strainer and a cap that can double as a measuring tool. However, the Boston shaker—consisting of two tins—is often favored by professionals for its larger volume, allowing for more ice and better aeration.
| Shaker Type | Pros | Cons |
|---|---|---|
| Cobbler Shaker | All-in-one design; easy to hold; built-in strainer. | Small volume; can sometimes leak or freeze shut. |
| Boston Shaker | Large capacity; easy to clean; superior aeration. | Requires a separate strainer; requires two-handed operation. |
| Parisian Shaker | Aesthetic appeal; secure seal. | No built-in strainer; less common in retail. |

Step-by-Step Guide: How to Craft the Perfect Shaken Iced Coffee
To achieve the best results, you must follow a disciplined process. Simply throwing coffee and ice together isn’t enough; the order of operations and the duration of the shake are vital to the “summer-saving” quality of the drink.
Preparation and Execution
Start by brewing your coffee. While cold brew is a popular choice, shaking actually excels at cooling down freshly brewed hot coffee or espresso. If using hot coffee, ensure your shaker is made of high-quality stainless steel to handle the temperature transition. Fill the shaker about two-thirds full with large, solid ice cubes. Avoid crushed ice, as it will melt too quickly and over-dilute your beverage.
Pour the coffee over the ice. If you prefer your coffee sweetened, add your simple syrup or agave at this stage. Seal the shaker tightly. Hold the shaker with both hands and shake vigorously for 15 to 20 seconds. You should feel the outside of the shaker become painfully cold to the touch. This is the signal that the drink is ready.
The Pour
Strain the coffee into a glass filled with fresh ice. Do not reuse the ice from the shaker, as it has been structurally compromised and will melt rapidly in your glass. The result should be a dark, rich liquid topped with a thick, tan layer of foam that holds its shape.

Advanced Techniques: Elevating Your Iced Coffee Experience
Once you have mastered the basic shake, you can begin to experiment with flavor infusions that are only possible through the high-energy environment of a cocktail shaker. This is where the “cocktail” aspect of the tool truly shines.
Flavor Infusion and Emulsification
Because shaking creates such intense movement, it is the perfect time to incorporate aromatic ingredients. Adding a sprig of mint, a piece of orange peel, or even a cinnamon stick to the shaker allows the ice to “muddle” these ingredients against the walls of the shaker, releasing their essential oils directly into the coffee. This provides a subtle, sophisticated flavor profile that is far superior to store-bought flavored syrups.
For those who enjoy milk or creamers, shaking provides a unique benefit. When you shake milk with coffee, the fats in the milk help stabilize the foam, creating a drink that is almost like a cold, airy latte. This is the secret behind the famous “Shaken Espresso” drinks seen in global coffee chains.

Maintenance and Care for Your Coffee-Infused Barware
Using a cocktail shaker for coffee requires a slightly different cleaning regimen than using it for spirits. Coffee oils are persistent and can go rancid if not properly removed, which will ruin the flavor of both your morning coffee and your evening martinis.
Deep Cleaning Protocols
After every use, rinse the shaker immediately with hot water. Once a week, it is recommended to perform a deep clean using a mixture of baking soda and warm water. This helps neutralize the acidity of the coffee and removes any stubborn oil residue. If your shaker has a built-in strainer (like a Cobbler), pay special attention to the small holes where coffee grounds or dried milk can become trapped.
- Avoid Abrasives: Do not use steel wool on stainless steel shakers, as it can create micro-scratches where bacteria can grow.
- Dry Thoroughly: Always store your shaker disassembled to allow air to circulate and prevent “musty” odors from developing.
- Check Seals: Periodically inspect the rubber gaskets if your shaker has them, as the temperature fluctuations from hot coffee to cold ice can cause wear over time.

The Versatility of the Modern Shaker in Home Beverage Crafting
The cocktail shaker is a testament to the idea that great tools are multi-functional. By investing in a high-quality shaker, you are not just buying a piece of barware; you are acquiring a versatile thermal engine capable of transforming your home beverage experience. Whether you are looking to save your summer with a perfectly chilled iced coffee or hosting a dinner party with artisanal cocktails, the shaker remains an indispensable ally.
Ultimately, the user experience of mixing iced coffee in a shaker is about more than just the end result. It is about the ritual—the sound of the ice hitting the metal, the frost forming on the outside of the tin, and the visual satisfaction of pouring a perfectly foamed drink. It elevates a routine caffeine fix into a moment of craft and care.
Frequently Asked Questions (FAQ)
- Q1: Can I shake hot coffee directly in a cocktail shaker?
- Yes, but you must be careful. Hot liquid creates pressure. When you add hot coffee to ice in a sealed shaker, the air inside cools rapidly, which can sometimes create a vacuum, making the shaker hard to open. Always ensure a firm grip and start shaking immediately to stabilize the temperature.
- Q2: Why is my shaken iced coffee too watery?
- This usually happens if you shake for too long or use small, “hollow” ice cubes. For the best results, use large, solid ice cubes and limit your shaking to 20 seconds. Also, always strain the coffee into a glass with fresh ice rather than using the melted ice from the shaker.
- Q3: Do I need a professional Boston shaker, or is a mason jar okay?
- While a mason jar can work in a pinch, it lacks the thermal conductivity of stainless steel. Metal shakers chill the liquid much faster. Additionally, glass jars don’t have built-in strainers, making it harder to achieve that perfect foam-to-liquid ratio during the pour.
- Q4: How do I get that thick foam on top of my coffee?
- The foam comes from the proteins in the coffee and the aeration from shaking. To maximize foam, use freshly brewed espresso or a very strong concentrate. Shaking vigorously is key—the more energy you put into the shake, the better the aeration.
- Q5: Can I add milk or creamer to the shaker?
- Absolutely. Adding milk before shaking creates a much creamier texture than stirring it in afterward. The fats in the milk help to stabilize the air bubbles, resulting in a long-lasting, velvety head on your drink.